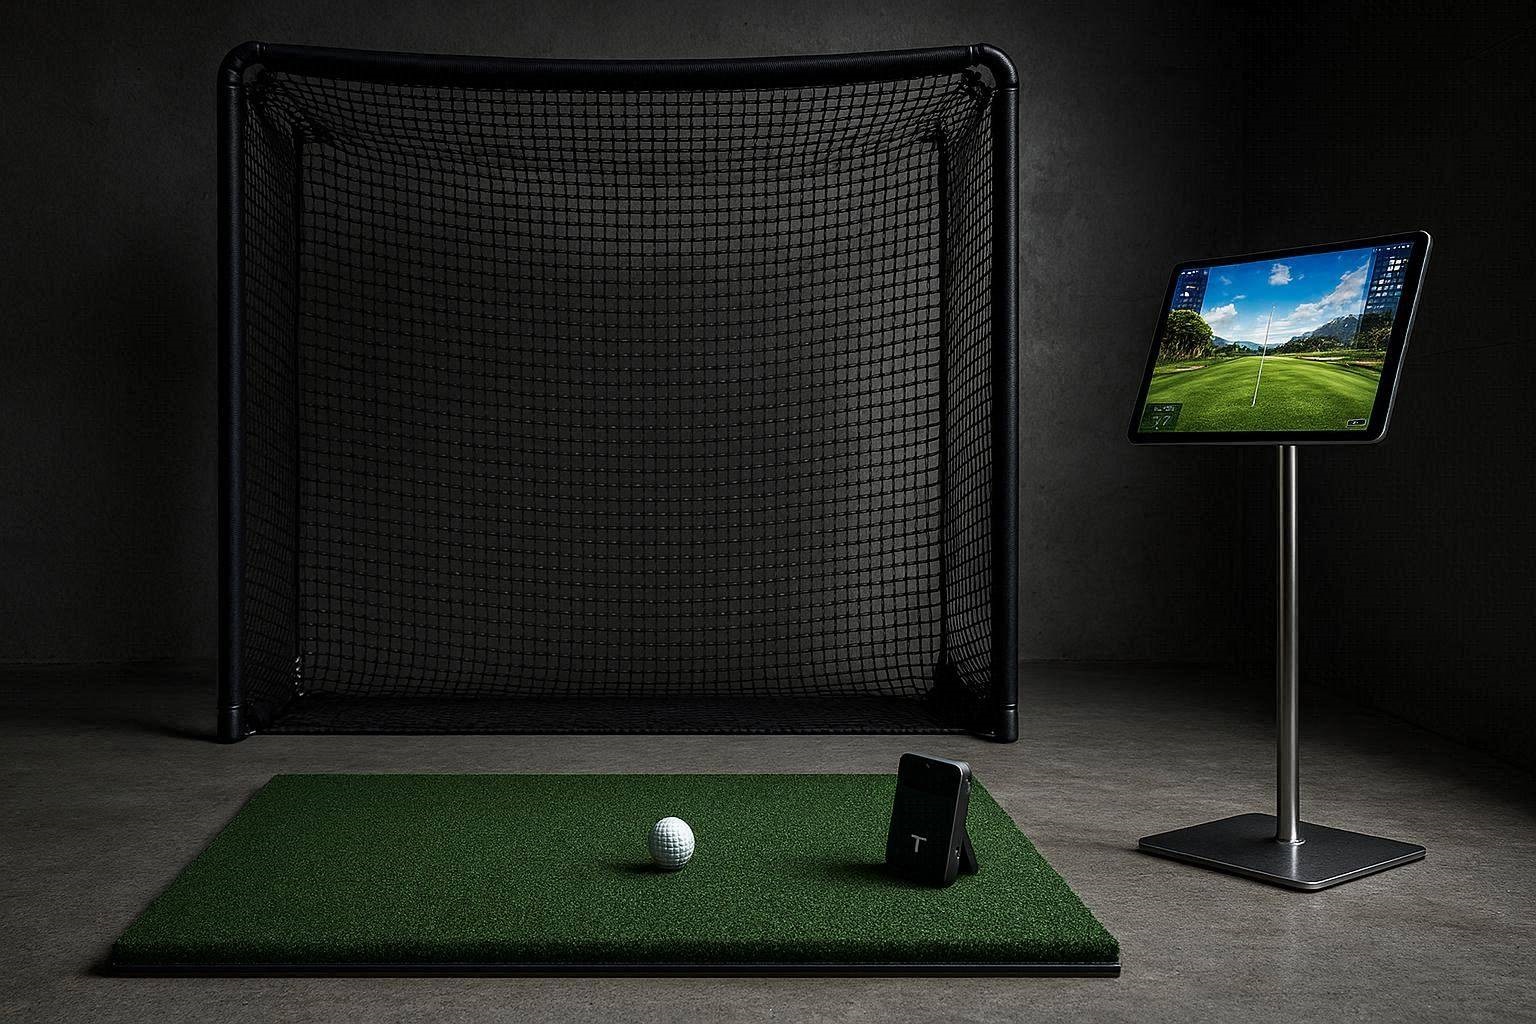
When transitioning from outdoor driving ranges to a localized home practice environment, designing your first hitting bay is a critical engineering exercise. The temptation to purchase a flimsy pop-up net and a thin piece of plastic grass is overwhelming for beginners looking to save capital. However, a poorly constructed starter golf simulator setup will not only provide highly inaccurate launch data, but it will also systematically destroy your wrists, elbows, and drywall. In 2026, the technology bridging consumer launch monitors and mobile devices (like an iPad or smartphone) has advanced dramatically, allowing you to bypass expensive gaming PCs entirely.
This comprehensive technical manual breaks down the exact hardware architectures, spatial requirements, and biomechanical safety standards necessary to build an efficient practice bay. Whether you are deploying a radar unit like the Garmin R10 or a photometric unit like the Rapsodo MLM2PRO, this guide details how to configure a seamless, app-driven starter golf simulator setup inside your garage without compromising on data integrity or physical health.
The “Quick Answer” / Key Takeaways
- The Biomechanical Threat: The hitting mat is infinitely more important than your containment net. Cheap foam mats placed over concrete will cause severe medial epicondylitis (golfer’s elbow); you must prioritize high-density nylon or silicone-gel strike strips.
- Radar vs. Camera Spatial Math: A Doppler radar launch monitor requires at least 16 to 20 feet of total room depth to function indoors, whereas a photometric (camera-based) monitor only requires enough space for you to safely swing a club.
- Net Containment Kinetics: Avoid cheap fiberglass pole pop-up tents for permanent garage builds. Utilize DIY ceiling-mounted curtain tracks paired with a heavy-duty 10×10 impact net for maximum safety and retractability.
- The Mobile Data Bridge: To push launch data to your iPad without latency, you must optimize your local Wi-Fi bands and configure your Bluetooth LE cache to prevent frustrating mid-session disconnects.
1. Launch Monitor Architecture: Doppler Radar Constraints
The brain of your starter golf simulator setup is the launch monitor. When attempting to keep costs down and project data directly to a phone or tablet, you must choose between two fundamentally different tracking technologies: Doppler radar and photometric cameras.
Doppler radar devices, such as the highly popular Garmin Approach R10 or the FlightScope Mevo+, sit physically behind the golfer. They emit continuous microwave frequencies down the target line. When you strike the ball, the microwaves bounce off the moving object and return to the sensor. By measuring the frequency shift (the Doppler effect), the internal algorithms calculate ball speed, launch angle, and spin axis.
However, radar systems are inherently constrained by indoor spatial physics. Because they must track the ball traveling through the air to calculate accurate spin decay and axis tilt, they require massive depth. A standard radar unit must be placed exactly 7 to 8 feet behind the golf ball. Furthermore, the ball must travel a minimum of 8 to 10 feet into the net before impact. This means your starter golf simulator setup will require an absolute minimum of 16 feet of unobstructed garage depth. If you attempt to condense this space, the radar will not capture enough physical flight time, resulting in severely inaccurate spin axis data and frustratingly short carry distances.
Additionally, radar is highly susceptible to indoor metallic interference. If your garage features a large metal refrigerator, exposed steel HVAC ducting, or a parked car sitting parallel to your hitting mat, the microwaves will bounce chaotically off these surfaces. This signal scrambling completely confuses the internal tracking processor. If you are building a radar-based starter golf simulator setup, you must ensure the primary radar cone is entirely devoid of large metallic objects.
2. Photometric Camera Systems: The Optical Advantage
If your garage lacks the 16-foot minimum depth required for radar, you must pivot to a photometric (camera-based) launch monitor. Devices like the Rapsodo MLM2PRO or the emerging Square Omni operate on entirely different physics.
Instead of tracking the ball over a long distance, photometric units sit adjacent to the hitting zone or slightly behind the ball and take ultra-high-speed sequential photographs (often exceeding 1000 frames per second) the exact microsecond the club impacts the ball. By analyzing the physical displacement of the ball’s dimples or specialized markers across these micro-frames, the onboard CPU calculates total spin and launch angle instantly.
The primary architectural advantage of a camera unit in a starter golf simulator setup is extreme space efficiency. Because the cameras capture all necessary data within the first 12 to 18 inches of ball flight, the distance to your impact net is irrelevant to the data accuracy. You only need enough physical space to safely swing your longest driver without hitting the wall. You can place your net just 5 feet in front of the ball, saving massive amounts of garage floor space.
However, photometric units introduce a different environmental constraint: lighting. High-speed global shutter cameras require intense illumination to prevent motion blur during capture. If your garage relies on a single, dim 60-watt incandescent bulb, the cameras will fail to lock onto the ball’s dimple pattern, resulting in constant “no-read” errors. You must install bright, direct LED spotlighting precisely over the hitting zone to ensure the optical sensors have the contrast necessary to calculate your shot metrics.
[IMAGE PLACEHOLDER: A split-screen visual showing the spatial layout of a radar unit sitting 8 feet behind the ball versus a photometric unit capturing data instantly at impact + Alt Text: Comparing radar and photometric tracking requirements for a starter golf simulator setup]
3. The Biomechanics of Hitting Mats: Prioritizing Joint Protection
The most catastrophic engineering mistake made by beginners building a starter golf simulator setup is allocating their entire budget to the launch monitor and purchasing a cheap, $50 generic driving range mat off Amazon. The hitting surface is the most critical component in your entire bay; it dictates your physical health.
When you execute a downward iron strike, the clubhead is traveling at roughly 80 to 90 miles per hour. On an actual golf course, the club penetrates the turf, shearing away the topsoil to create a divot. This physical displacement of dirt safely decelerates the clubhead, absorbing the massive kinetic energy of the swing.
If you place a cheap, thin EVA-foam golf mat directly over a concrete garage floor, there is zero kinetic displacement. The clubhead strikes a rigid, immovable barrier. The resulting shockwave—often exceeding hundreds of pounds of instantaneous peak force—reflects directly up the steel shaft and violently assaults the flexor tendons of your wrists and elbows. Over the course of a 50-ball practice session, this repeated micro-trauma will rapidly induce debilitating joint pain, effectively ruining your golf season.
Furthermore, cheap, low-density polypropylene mats introduce a severe data anomaly known as “mat bounce.” If you hit slightly behind the ball (a fat shot), the clubhead will bounce off the hard rubber base and skip cleanly into the back of the ball. The launch monitor will register a high-speed, perfect launch, giving you false positive feedback on a fundamentally flawed swing.
4. Engineering the Strike Zone: Premium Inserts and Modular Trays
To protect your joints and your data, your starter golf simulator setup must incorporate a commercial-grade hitting surface. If you are operating on a strict budget, you do not need to purchase a massive 5-foot by 5-foot premium mat. The highly recommended technical hack is to build a hybrid floor.
You can purchase a cheap, large stance mat to stand on, but you must cut a precise 12-inch by 28-inch rectangular hole into the center where the ball is placed. Into this void, you drop a premium, highly engineered hitting insert.
The two primary architectures for injury prevention are high-density nylon and compression matrices. Products like the Sigpro Softy utilize deep vertical compression slots beneath the turf canopy. When the club strikes down, the internal air pockets collapse, perfectly simulating the physical yield of real topsoil. Alternatively, low-friction bristle systems, such as the Fiberbuilt Grass Series, use upright synthetic fibers that allow the club to pass cleanly through the strike zone without violent deceleration. Both systems absorb the kinetic shockwave before it reaches your arms, and both heavily penalize fat shots, ensuring your iPad displays authentic, un-altered launch metrics.
[EXTERNAL LINK: Detailed biomechanical analysis of shock transfer and tendon strain caused by rigid artificial turf impacts over concrete subfloors]
5. Containment Kinetics: Designing the Impact Net Structure
Once your launch tracking and hitting physics are locked in, you must contain the projectile. A golf ball leaving a driver face can exceed 160 miles per hour. A standard starter golf simulator setup usually defaults to a cheap, fiberglass-pole pop-up tent. While these are adequate for temporary outdoor use, they are heavily discouraged for permanent indoor garage builds.
Pop-up tents rely on tensioned poles that inevitably snap under continuous indoor use. Furthermore, their containment netting is often constructed from low-denier polyester that degrades rapidly. When a high-velocity ball strikes a weak, single-ply net repeatedly in the exact same spot, the mesh will eventually fail, sending a projectile straight through the net and into your drywall or parked vehicle.
For a robust garage installation, you should utilize a commercial-grade impact net suspended from an overhead tracking system. By mounting an aluminum curtain track to your garage ceiling, you can hang a heavy-duty, 10-foot by 10-foot archery-grade impact net. This provides a massive, square containment zone that easily catches extreme toe-shanks and high-lofted lob wedges.
The physics of deceleration favor a hanging net. Because the net is suspended freely from the top track rather than pulled tight across a rigid fiberglass frame, the mesh acts as a massive kinetic shock absorber. When the ball hits the loose netting, the material billows backward, catching the ball and dropping it harmlessly to the floor. Crucially, a track-mounted net can be instantly slid to the side of the garage when not in use, instantly reclaiming your floor space for parking vehicles.
6. The Mobile Data Bridge: iOS and iPadOS Synchronization
The primary appeal of a modern starter golf simulator setup is the ability to bypass expensive gaming computers and push data directly to an iPad or smartphone. However, establishing a zero-latency data bridge between external hardware and mobile operating systems requires specific network configurations.
Devices like the Rapsodo MLM2PRO utilize a dual-connection protocol. The initial hardware discovery phase is executed via Bluetooth Low Energy (LE), while the heavy lifting of transmitting 1000 FPS slow-motion impact video is handled via a localized Wi-Fi Direct connection.
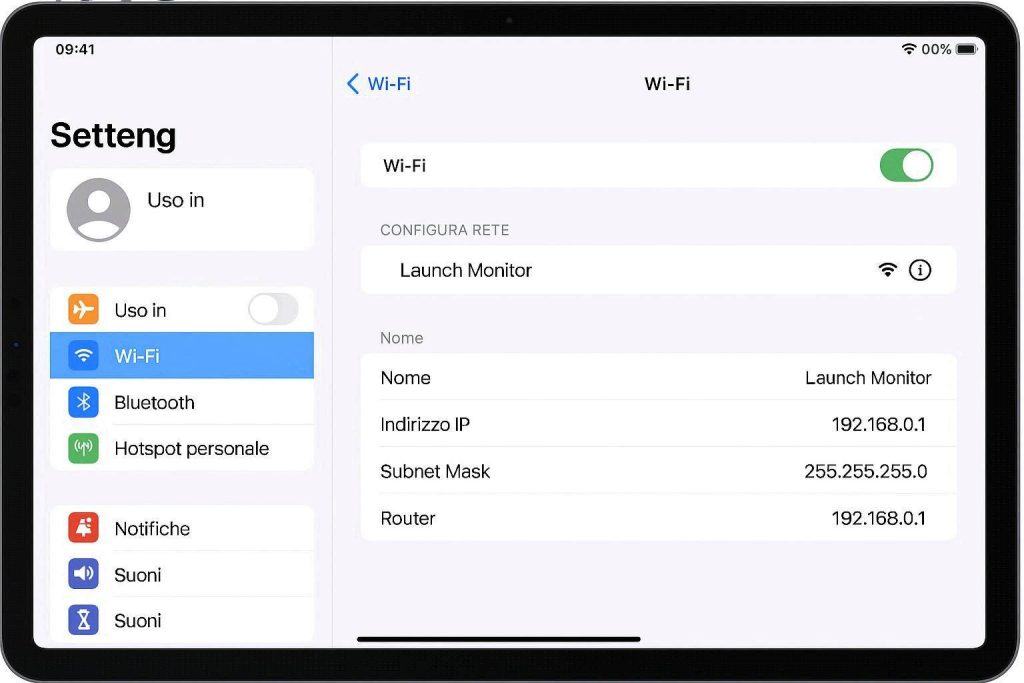
If your iPad constantly fails to find your launch monitor, the issue is almost always rooted in the iOS permission stack. Apple’s stringent privacy protocols automatically block applications from scanning localized networks. You must navigate to your iPad’s internal settings, locate the specific simulator application, and manually toggle both “Local Network Access” and “Precise Location Services” to the ON position. If these background permissions are restricted, the iPad’s wireless card is physically sandboxed, leaving it completely blind to the launch monitor sitting right next to it.
Additionally, you must manage your home router’s interference. If your iPad is heavily tethered to your home’s 5GHz mesh Wi-Fi network, it will aggressively resist switching to the launch monitor’s internal 2.4GHz broadcast signal. The most effective technical fix is to utilize the launch monitor’s “Local Hotspot Mode.” This forces the monitor to act as its own independent router. You connect your iPad directly to the monitor’s unique SSID network name, entirely bypassing your home internet. While connected this way, your iPad will not have web access, but it will maintain an unbreakable, zero-latency pipeline for your shot data.
7. Display Expansion: Casting Your Data to the Big Screen
Staring at a 10-inch iPad screen while standing 8 feet away on your hitting mat is sub-optimal for practice flow. While you may not have the budget for a 4K short-throw projector and a premium impact screen, you can easily expand your starter golf simulator setup’s visual footprint using consumer casting technology.
If you have a spare 43-inch or 55-inch flat-screen TV, mount it securely to the side wall of your garage, positioned slightly ahead of your hitting mat to remain out of the peripheral swing plane. To mirror your iOS data to the display without introducing massive input lag, you have two primary options:
- The Hardware Bridge (Zero Latency): The most reliable method is a physical hardwire. Purchase a high-bandwidth USB-C to HDMI hub. Plug the USB-C end into your iPad Pro and run a long, braided HDMI 2.1 cable directly to the television. This creates a hardwired digital pipeline that mirrors your shot tracer and data analytics to the large screen instantly, with absolutely zero frame drops or Wi-Fi compression artifacts.
- The Wireless Bridge (Apple TV): If running cables across your garage floor is a tripping hazard, attach an Apple TV 4K box to the HDMI port of your television. Using the native iOS “Screen Mirroring” protocol, you can cast your iPad’s simulator application directly to the Apple TV over your local network. Note that wireless casting introduces a micro-second of latency; the ball will hit the net slightly before the virtual shot begins tracing on the television screen.
8. Space Allocation: Calculating the Geometric Footprint
Before purchasing a single piece of hardware, you must aggressively calculate the geometric limits of your garage. A starter golf simulator setup is entirely dictated by ceiling height and swing radius.
The absolute minimum ceiling height required to swing a modern 45.5-inch driver without striking the drywall is 9 feet (108 inches). If your garage ceiling is exactly 8 feet, you are physically restricted to swinging irons and wedges. Attempting to artificially flatten your swing plane to avoid hitting a low ceiling will permanently ruin your spine angle and biomechanical sequencing, leading to severe swing flaws on the actual course.
Beyond ceiling height, you must map the “Safety Cone.” When you stand on the hitting mat, measure 8 feet forward to the impact net. Measure 8 feet behind you for your backswing clearance, and ensure you have at least 5 feet of lateral clearance behind your back to prevent your club from striking the garage door tracks. If you are utilizing a 10-foot wide impact net, it must be positioned at least 12 to 18 inches away from the hard wall behind it. If the net is flush against the drywall, the billowing effect of catching a 160mph golf ball will push the mesh directly into the sheetrock, leaving massive dents in the wall.
5 Critical Factors for Simspace Enclosure Measurements and Aspect Ratio Optimization
The Premium Affiliate / Monetization Upgrade Path
A starter golf simulator setup is designed to get you swinging quickly, but as your handicap drops and your swing speeds increase, you will inevitably outgrow budget components. Pop-up nets will tear, and cheap stance mats will compress. When you are ready to transition your garage from a basic hitting bay into a commercial-grade digital training facility, you must source your upgrades from specialized indoor golf engineers.
Do not attempt to purchase high-end impact screens or customized enclosure cages from generic Amazon storefronts. The fabrics utilized in cheap screens will completely wash out projection light and bleed massive amounts of dust into your garage environment. We strongly advise sourcing your permanent bay upgrades through authorized premium retailers such as Carl’s Place or The Indoor Golf Shop (both highly accessible via verified consumer affiliate networks like ShareASale or PartnerStack).
By utilizing these specialized distributors, you gain access to customized DIY Enclosure Kits where you can input your exact garage dimensions down to the inch. Their multi-layer, noise-dampening polyester impact screens are specifically woven to absorb high-velocity impacts while displaying razor-sharp 4K digital course graphics. Upgrading your containment net to a professional Carl’s Place enclosure paired with a commercial-grade Fiberbuilt striking surface ensures that your launch monitor’s data pipeline is analyzing pure, unadulterated swing mechanics.
Preventative Maintenance and Quick-Action Checklist
To guarantee your starter golf simulator setup remains safe and highly accurate throughout heavy winter practice sessions, execute this hardware audit every 30 days:
- The Net Tension Audit: Inspect the perimeter binding and the primary impact zone of your netting. If you use a track-curtain setup, ensure the carabiner clips attaching the net to the aluminum sliders are not bent or fatiguing. If the mesh fibers in the center target area appear frayed or fuzzy, rotate the net 180 degrees immediately. A frayed net will fail completely on the next high-velocity driver strike.
- The Turf Rotation Hack: You are hitting every single ball from the exact same square inch of turf. To prevent the internal foam matrix of your premium hitting strip from developing a permanent compression depression, physically lift the 12×28 insert out of the floor cutout, rotate it completely backwards, and re-insert it. This simple maneuver doubles the lifespan of your shock-absorbing materials.
- Firmware and Cache Flush: Before logging into your launch monitor application for a long session, open your iPad settings and force-close all background applications. Manually check the Apple App Store for the latest launch monitor software update, and verify the internal firmware of the physical tracking unit. Outdated firmware is the leading cause of Bluetooth desynchronization and optical calculation errors.