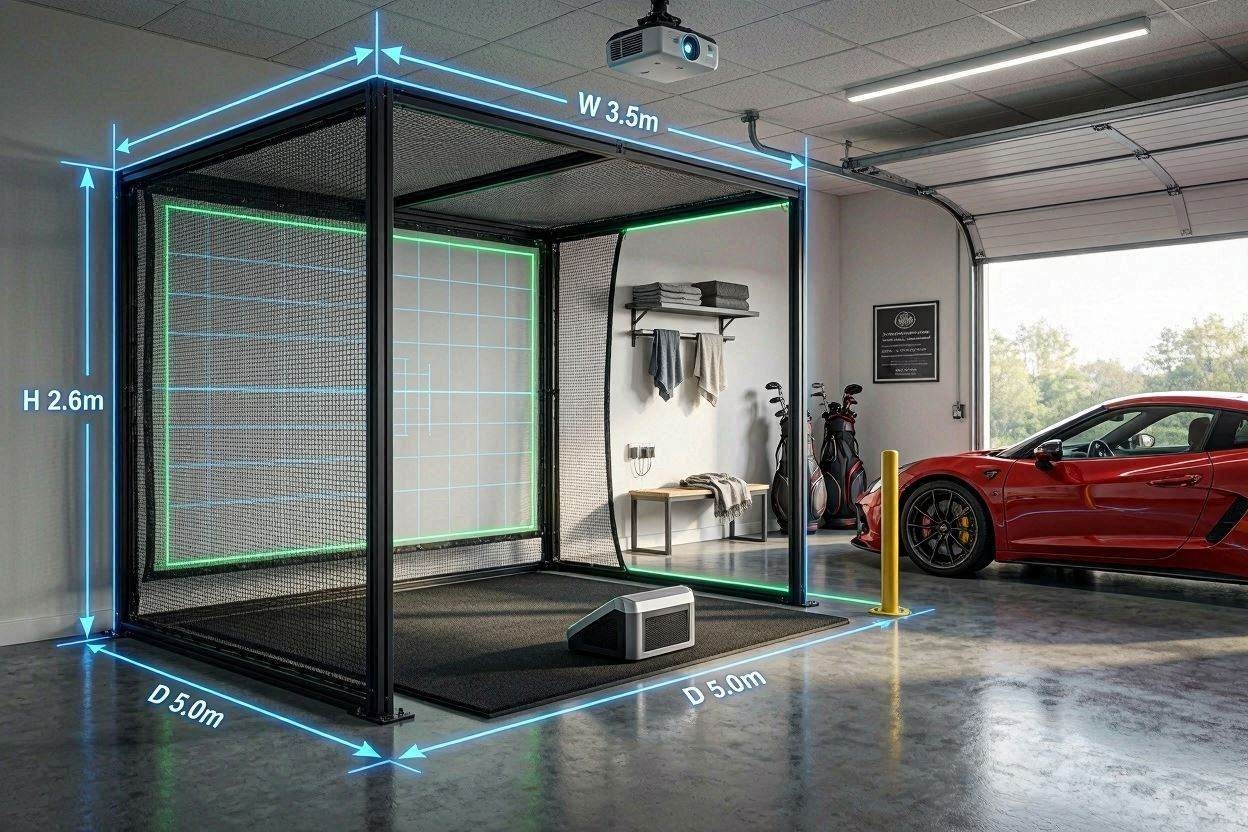
When designing a premium indoor golf studio inside a dual-purpose space like a residential garage, physical spatial geometry is the single most important factor. Making a wrong decision on structural dimensions can render your entire space unusable for parking or dangerous for full driver swings. Golfers frequently struggle to choose between various pre-built enclosure options, wondering how frame depth dictates hitting distance and whether a square frame compromises projection realism. This comprehensive technical guide analyzes the exact physics of golf simulator layouts, spatial safety clearance parameters, and structural configurations to help you perfectly plan your indoor hitting bay.
The “Quick Answer” / Key Takeaways
- The Depth Threshold: A shallow 1.5-meter enclosure depth requires the golfer to stand further back from the screen, meaning the shallow side walls lose their physical ability to catch extreme shanks or high-lofted wedges.
- Driver Swing Clearance: To safely swing a driver without striking a ceiling or hitting the structural enclosure framework, a minimum distance of 2.5 to 3 meters from the screen to the ball is mandatory.
- Aspect Ratio Flexibility: Projecting a 4:3 image onto a 1:1 square screen creates blank black borders at the top or bottom, but it can be easily managed via software scaling without distorting the physical ball physics.
- Space Optimization: For dual-car garage builds, choosing a narrower or shallow enclosure allows vehicles to clear the hitting bay structural frame when the simulator is not actively in use.
1. Analyzing the Geometric Foundations of Enclosure Dimensions
Planning a home golf simulator requires a perfect balance between tracking requirements and room optimization. When analyzing different pre-built options, structural dimensions are typically categorized by height, width, and depth. For spaces that must remain functional for parking vehicles, every millimeter of frame footprint matters.
The physical frame must be large enough to act as a reliable visual target and an absolute safety cage for off-center hits. However, if the frame footprint extends too far into the room, it can permanently ruin the spatial flow of your home. When evaluating common structural packages, the two configurations that buyers most frequently compare are the square 3m x 3m x 3m cage and the shallower, narrower rectangular variations.
A square 3-meter frame provides an exceptional visual canvas, but a 3-meter depth means the side tracking walls extend significantly into the center of the floor space. If your garage needs to clear parked vehicles when the simulator is inactive, a deep side wall can physically block car doors or force you to park at dangerous angles. Conversely, moving down to a shallower depth solves the vehicle clearance issue but introduces complex aerodynamic tracking risks that alter where the golfer must stand.
2. The Danger of Shallow Depth: Hitting Distance vs. Enclosure Coverage
When evaluating a shallow frame footprint, such as a 1.5-meter depth option, you must completely re-calculate your physical hitting position. Frame depth does not simply dictate how much space the cage takes up; it directly governs your absolute safety margin against errant balls, shanks, and high-lofted wedge shots.
If an enclosure features a shallow 1.5-meter depth, the physical impact screen sits exactly 1.5 meters from the back wall, and the protective side walls extend forward by only 1.5 meters. To safely swing a standard 45.5-inch driver without your backswing colliding with the rear frame or your follow-through striking the ceiling structure, the human body requires a minimum clearing radius. Biomechanical tracking proves that a golfer must stand between 2.5 and 3 meters away from the actual impact screen face to execute a full, unrestricted swing.
[IMAGE PLACEHOLDER: Side profile technical drawing showing the swing radius of a driver and the safety cone required for shallow versus deep enclosures + Alt Text: Comparing driver clearance distances based on varying Simspace enclosure measurements]
This creates a dangerous spatial gap. If you are standing 3 meters away from the screen, but your protective side walls only extend forward by 1.5 meters, there is a 1.5-meter open void between your body and the start of the enclosure cage. If you hit an extreme toe-shank or an off-center heel slice, the ball exits the clubface at an acute lateral angle before it ever reaches the protection of the netting. The ball will completely miss the enclosure side walls, striking your unprotected drywall, garage door tracks, or nearby vehicles.
Furthermore, consider the vertical launch angle of short game practice. A standard 60-degree lob wedge can easily launch a golf ball at an initial vertical trajectory exceeding 45 degrees. If you are forced to stand 3 meters back from a shallow enclosure, the ball’s ascending flight path will overshoot the top of the 1.5-meter deep roof panel entirely. The ball will strike the raw ceiling of your room, generating high-velocity ricochets that threaten both the player and sensitive tracking computers. Therefore, if you deploy a shallow depth, you must install secondary protection, such as heavy ceiling baffles or extended side netting drapery, to close the open safety loop.
3. The 1:1 vs. 4:3 Aspect Ratio Dilemma
An architectural challenge when configuring your layout is aligning the physical aspect ratio of the frame with the digital projection output of your simulation software. Most premium enclosures are built as perfect 1:1 squares to maximize height within tight rooms. However, modern golf simulation engines are designed to display in widescreen formats.
Understanding Aspect Ratio Formats
An aspect ratio is simply the proportional relationship between the width and height of an image. A 1:1 ratio means the screen is a perfect square. A 4:3 ratio is a classic standard television format, while a 16:9 ratio represents modern high-definition widescreen.
| Structural Screen Format | Width Proportion | Height Proportion | Primary Use Case |
| 1:1 Square | 1 | 1 | Maximum vertical height in narrow garage spaces |
| 4:3 Standard | 4 | 3 | Optimal balance for short-throw commercial projectors |
| 16:9 Widescreen | 16 | 9 | Maximum immersion, requires substantial room width |
Projecting Widescreen Software onto a Square Canvas
If you opt for a 1:1 square structural option, you have two distinct software methods to handle the projection:
- The Letterbox Method: You configure your graphics processor to output a native 4:3 or 16:9 image. When this rectangular image hits the square 1:1 screen, it fills the screen completely from left to right, but leaves prominent black bars at the top and bottom of the impact screen canvas.
- The Native Square Fill: You force the simulation engine (such as GSPro) to output a custom resolution that matches a 1:1 ratio. While this utilizes every single inch of the impact material, it mathematically compresses the horizontal field of view. The virtual golf course will feel vertically elongated, making the target flagstick look taller and narrower than it appears in real life.
Can you use a 4:3 projection on a 1:1 screen frame? Absolutely. Most golfers prefer the 4:3 output on a square frame because it minimizes the unutilized black space while preventing the extreme horizontal distortion associated with squishing a 16:9 widescreen image into a perfect square.
Detailed breakdown of custom resolution configuration for golf simulator projectors
4. Vehicle Clearance and Spatial Multitasking
For users installing a hitting bay inside an active residential garage, the layout must be treated as a flexible workspace. If the garage must house two cars during the winter months, selecting a permanent 3m x 3m x 3m cage can completely ruin the room’s utility.
When cars are parked parallel to the hitting bay, clear walking space is required to navigate around the vehicles without scratching paint or squeezing past tight metal poles. If your room features exactly 2.5 meters of clearance from the back wall to the bumper of your parked vehicle, a 3-meter deep enclosure is physically impossible to install. It would smash directly into the hood of the car.
In this specific spatial scenario, the shallower and narrower 3m x 2.5m x 1.5m option becomes highly logical, provided you mitigate the open safety gaps highlighted in Section 2. By reducing the width to 2.5 meters and the depth to 1.5 meters, you preserve a massive chunk of floor space, allowing passengers to comfortably exit vehicles and walk completely around the perimeter of the hitting bay frame. The enclosure ceases to be an invasive structural block and transforms into a clean, integrated architectural element of the home.
5. Projector Placement and Swing Plane Interference
The final math variable when fine-tuning your dimensions is calculating the exact placement of your short-throw projector relative to the top of the enclosure frame. If your enclosure height is exactly 3 meters, your projector must be mounted slightly higher than the frame to clear the roof netting, or it must be positioned safely in front of the hitting screen to project downward at a steep angle.
If you are standing 2.5 to 3 meters back from the screen to swing your driver, your physical body and the clubhead path will intersect the projection beam if the projector is placed directly overhead. This creates an annoying shadow on the screen precisely where you are trying to aim.
To eliminate this issue, short-throw projectors with a throw ratio of roughly 0.5:1 are deployed. This allows the projector to be mounted exceptionally close to the screen faceplate—often just 1.5 to 2 meters away. If your projector is sitting 1.8 meters away from the screen, and you are swinging from 3 meters back, you are standing completely behind the light source. This eliminates shadows entirely, ensuring a pristine visual environment.
[INTERNAL LINK: 7 Technical Specs for the Best Golf Simulator Hitting Mats in 2026: Injury Prevention Guide]
6. The Premium Enclosure Upgrade (Affiliate Engine)
Selecting the ideal dimensions is only the first step; you must ensure the structural materials can withstand the violent impacts of real golf balls over years of continuous use. Low-grade online kit frames often utilize cheap, lightweight aluminum poles that bend upon impact, paired with thin screens that wear out or drop frames when hit by high-velocity driver shots.
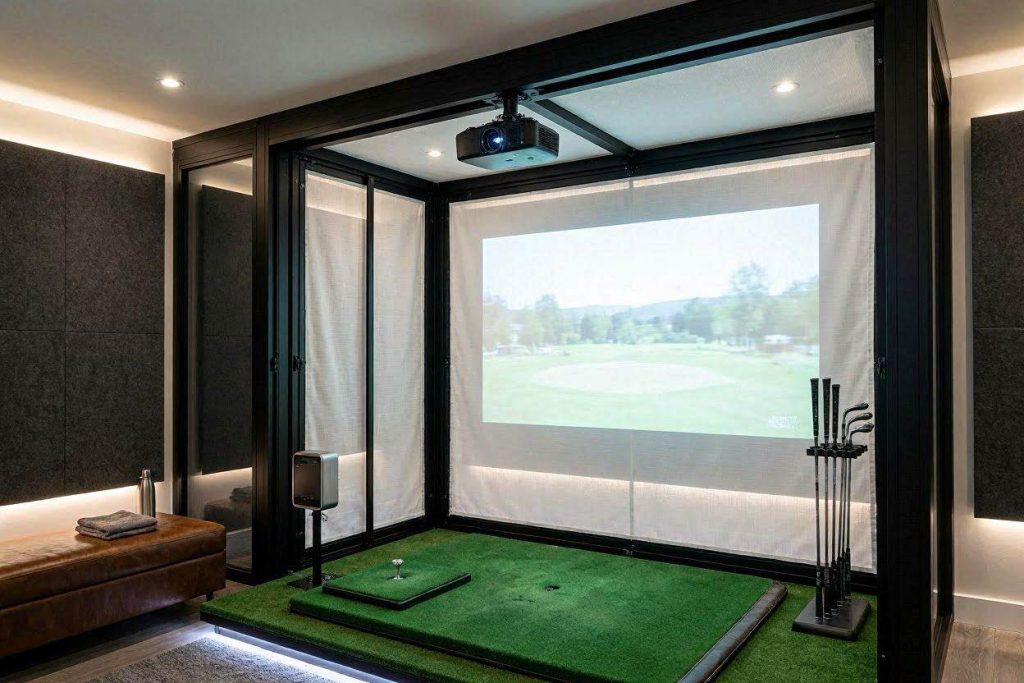
To turn your layout dimensions into an indestructible, commercial-grade facility, you must invest in premium raw components. We strongly recommend sourcing your custom structural setups through certified indoor golf engineers like Carl’s Place or The Indoor Golf Shop (available via top-tier corporate networks like ShareASale and Impact). Carl’s Place specializes in highly customized DIY Enclosure Kits where you can input your exact measurements down to the inch, ensuring a perfect fit around your garage doors or parked cars.
Furthermore, their Premium C-Series Enclosures feature thick, black ballistic nylon walls that absorb errant shots completely silently, paired with triple-layer polyester impact screens that display rich 4K imagery with zero text distortion. Upgrading to a professional-grade modular kit eliminates the headache of custom pipe-threading and guarantees that an off-center shot will never break a window or scratch your vehicle.
7. The Preventative Maintenance Framing Checklist
To guarantee long-term safety and structural integrity inside a dual-car garage environment, execute this engineering safety audit every 6 months:
- Tension Cord Inspection: Impact screens are suspended inside the metal frame using high-elasticity bungee cords or tension springs. Over time, repeated ball impacts will stretch these connectors out, causing the screen to sag. Check the tension regularly; a loose screen creates dangerous bounce-back, throwing the ball straight back at the golfer’s face.
- Frame Joint Torque Check: The continuous structural vibration of golf balls hitting the screen will gradually loosen the set-screws inside the metal corner joints. Use an Allen wrench to re-torque every structural connector frame joint twice a year to ensure the entire cage remains perfectly rigid and plumb against the wall.
2 thoughts on “5 Critical Factors for Simspace Enclosure Measurements and Aspect Ratio Optimization”