Building a personal golf training setup is a major milestone for any golfer looking to systematically lower their handicap. The processing market for launch monitors has expanded rapidly, moving advanced tracking data out of private tour vans and dropping it directly into residential backyards, garages, and patios. However, entering this arena can quickly induce decision paralysis, as the sheer volume of competing tracking devices presents completely different engineering architectures, software models, and pricing thresholds.
Learning how to pick a launch monitor requires shifting your focus away from promotional marketing brochures and looking directly at the raw mechanical parameters of data tracking. Balancing a device’s core sensor hardware with your specific physical environment—such as hitting into an outdoor net versus building a dedicated indoor screen bay—is the single most important factor to prevent tracking dropouts and data inaccuracies. This comprehensive guide will dissect the structural technologies, computer dependencies, and physical parameters needed to choose your tracking system with complete confidence.
Key Takeaways / Quick-Action Summary
- Architectural Alignment: The environment dictates the engine. Radar-based systems excel in deep, longitudinal spaces with direct views of ball flight, while photometric camera systems are superior for tight, enclosed spaces or short-range net configurations.
- Data Verification Pathways: High-performance training requires measured spin axis and club path profiles. Avoid units that rely on software models to guess spin parameters, particularly when executing short chips or high-lofted wedge shots.
- Display Infrastructure Constraints: Determine your primary viewing terminal early. Dedicated gaming computers deliver ultra-high-definition course rendering, but mobile platforms like an iPad or iPhone provide superior portability for outdoor setups.
- Environmental Ambient Light Barriers: Outdoor tracking under direct, intense sunlight requires robust sensor filters to prevent image overexposure or radar wave refraction from surrounding thermal currents.
- Total Cost of Ownership: Look past the initial hardware price tag. Factoring in recurring annual software subscription fees is essential to calculate your true five-year equipment budget.
1. Defining Hitting Environments: Short-Range Net vs. Full Simulator Studio
The absolute first boundary to map when discovering how to pick a launch monitor is your physical hitting envelope. Attempting to deploy an elite tracking unit within an incompatible environmental layout will result in consistent missed reads, connection failures, and broken data packages.
Short-Range Net and Backyard Patio Configurations
Striking balls off a backyard patio or temporary turf mat into a standalone net presents a unique sequence of technical challenges for tracking sensors. In this specific configuration, the golf ball typically travels a very short distance—often only 8 to 10 feet—before its flight is stopped by the net fabric.
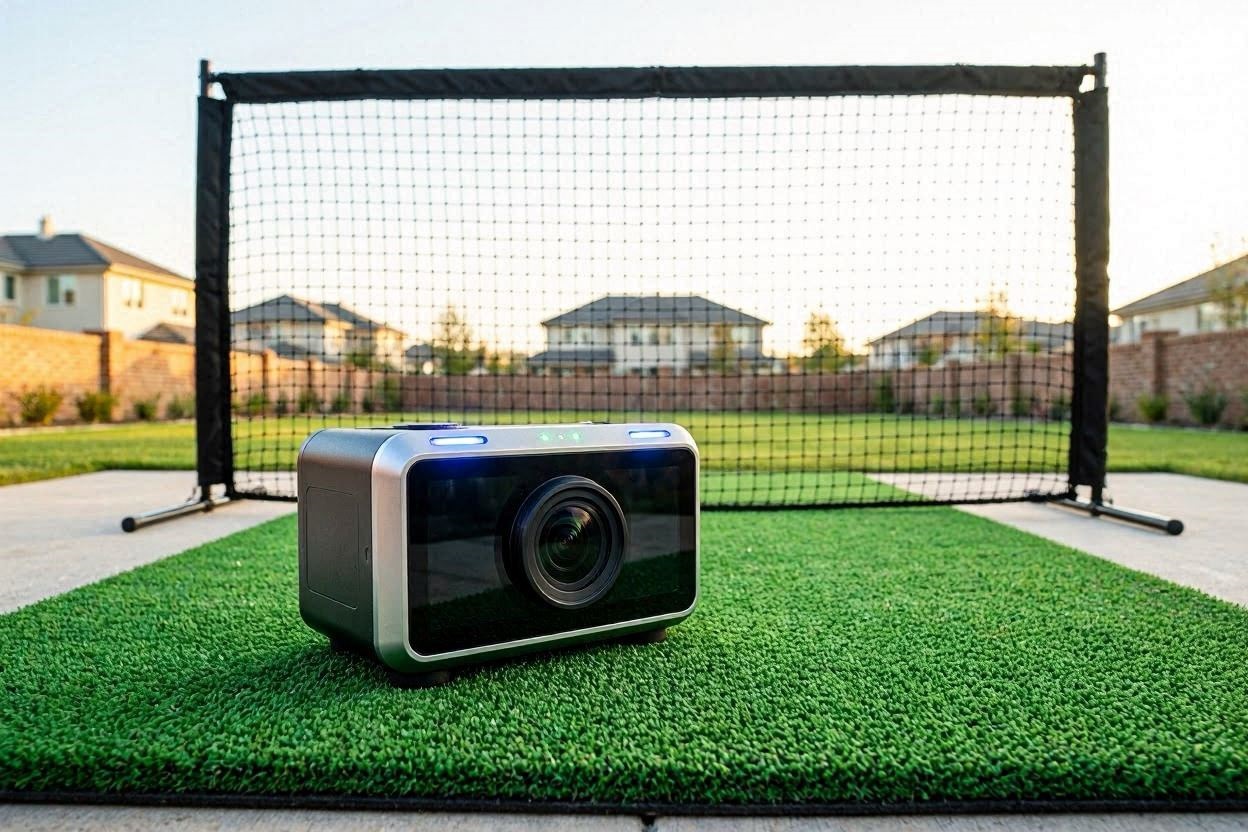
[IMAGE PLACEHOLDER: Low-angle close-up shot of a portable launch monitor sitting parallel to an outdoor hitting mat + Alt Text: Physical positioning parameters demonstrating how to pick a launch monitor for outdoor net environments]
Because the ball’s trajectory is cut short, the internal processing system has a incredibly small window of time to capture initial velocity changes, launch angles, and spin rates. If your setup must be disassembled and stored after every practice session, selecting a highly portable unit with rapid automated leveling features is vital to prevent initialization delays from cutting into your practice time.
Dedicated Indoor Simulation Bays
Building a permanent indoor hitting studio inside a garage, shop, or spare room shifts the structural constraints from portability to room dimensions. Permanent indoor configurations allow for the integration of ceiling-mounted components or heavy floor-based hardware that stays plugged into a central power terminal continuously.
In these enclosed spaces, you must carefully monitor structural height and width. While a 10-foot ceiling is the standard baseline to comfortably clear a driver swing, the proximity of the tracking hardware to side walls or metallic structural supports can heavily disrupt specific sensor fields.
2. Tracking Core Physics: Dual-Doppler Radar vs. Photometric Vision
The technical division in the launch monitor market splits down two primary physical paths: microwave radar wave tracking and high-speed optical camera analysis. Understanding these physical principles is foundational when analyzing how to pick a launch monitor for your specific space.
The Microwave Mechanics of Doppler Radar Systems
Radar-based launch monitors sit behind the golfer, typically positioned 6 to 10 feet rearward of the ball, looking directly down the target line. The device emits a continuous stream of high-frequency microwave radio signals into the hitting corridor. When the club head enters this field and strikes the ball, the radio waves bounce off the moving substrates and reflect back to the receiver panel.
+--------------------------+----------------------------+----------------------------+
| Structural Parameter     | Dual-Doppler Radar Arrays  | Photometric Camera Units   |
+--------------------------+----------------------------+----------------------------+
| Device Mat Placement     | 6 to 10 Feet Directly Rear | 14 to 18 Inches Side-Mat   |
| Flight Path Requirement  | Needs 10+ Feet of Flight   | Requires Zero Down-Range   |
| Measured Spin Mechanics  | Tracks Full Trajectory     | Direct Cover Pixel Mapping |
| Metallic Interference    | Highly Susceptible (HVAC)  | Completely Immune          |
| Outdoor Solar Adapt      | Flawless Data Capture      | Requires Optical Filtering |
+--------------------------+----------------------------+----------------------------+
By measuring the subtle frequency shifts of the returning waves—known as the Doppler effect—the tracking computer calculates velocity changes, horizontal launch angles, and down-range curvature. Out of doors, where the ball can fly completely un-obstructed until it lands, radar systems are exceptionally precise. However, in restricted indoor spaces or short net setups, the radar waves may not have enough time to track the ball’s rotation, requiring the use of specialized metallic or reflective dots on the ball cover to help the sensors verify true spin data.
The Image-Freezing Capabilities of Photometric Units
Photometric launch monitors are positioned on the ground, sitting 14 to 18 inches away from the golf ball, directly facing the player’s stance. These units utilize a series of ultra-high-speed cameras paired with global electronic shutters and synchronized infrared flash clusters.
Instead of tracking down-range flight, a photometric unit ignores everything happening beyond the immediate hitting area. The moment the club face impacts the ball, the infrared flashes trigger, and the cameras capture multiple high-resolution stereoscopic images within the first few inches of movement.
The device’s internal image-processing cores analyze these sequential frames to directly measure the physical displacement of the ball’s dimples against the backing turf. This allows the unit to calculate ball speed, launch angles, and true spin axis orientation instantaneously without needing to observe the ball’s actual flight curve down-range.
3. Data Point Extraction: Separating Direct Measurements from Algorithmic Estimates
When evaluating equipment tiers, the value of a launch monitor is defined purely by the purity of its data extraction. Low-end training devices often attempt to save on hardware costs by measuring only one or two core parameters, utilizing mathematical modeling to guess the remaining data fields. High-performance game improvement demands direct, unfiltered measurements.
Ball Launch Performance Standards
To effectively diagnose structural swing flaws, your launch monitor must directly measure ball speed, launch angle, total spin rate, and spin axis orientation. Spin axis is the single most critical data parameter for shot shaping; it dictates whether your ball flight results in a tight draw, a controlled fade, or a destructive slice that leaks into the right-hand rough.
Units that utilize pure dimple-recognition software process these spin parameters natively by reading the natural textures of the ball cover. This approach completely removes the need to use specialized marked golf balls or apply high-contrast ink patterns to your equipment. This feature is highly advantageous for backyard net training, allowing you to quickly pull any ball out of a practice bucket and receive tour-validated feedback on your screen.
Club Delivery Integration and the Sticker Matrix
Understanding your club head’s spatial orientation through the impact zone is essential to correct swing path errors and optimize launch efficiency. Advanced metrics include club head speed, path angle, face angle, face-to-path relationship, and angle of attack.
To extract these complex club metrics, many photometric systems require you to apply small, highly reflective fiducial stickers to your club face. The unit’s infrared cameras look specifically for these high-contrast markers as the club sweeps through the hitting zone, tracing their moving spatial geometry with extreme precision.
While applying stickers can feel tedious for casual multiplayer social events, it delivers an unparalleled level of data accuracy for individual practice, tracking the exact millimeter of face contact and the precise angle of attack down to a fraction of a degree.
4. Software Infrastructures: Dedicated Computing Workstations vs. Mobile iOS Apps
The choice of your primary viewing terminal dictates the mobility, operational cost, and graphical performance of your simulator ecosystem. You must align your device’s processing output with your intended practice location.
High-Performance Windows Gaming PCs
If your training setup is anchored inside a permanent garage bay or custom indoor studio, running your launch monitor through a dedicated Windows gaming computer is the superior option. Elite golf simulation engines like GSPro leverage highly advanced graphics platforms to render photorealistic virtual representations of real-world tour venues.
* Minimum PC Tier (1080p Playback): Intel Core i7 Processor, 16GB RAM, NVIDIA RTX 4070 GPU
* Premium PC Tier (Ultra-HD 4K Display): Intel Core i9 Processor, 32GB RAM, NVIDIA RTX 4080/4090 GPU
These heavy-duty computer configurations allow the simulation engine to process intense graphical shaders, complex water movements, and true turf friction algorithms without dropping frame rates. However, setting up a gaming PC requires routing direct, high-bandwidth USB-C tethers or shielded Cat6a Ethernet cables to prevent data transfer latency between the tracking unit and the screen.
The Seamless Portability of iOS Applications
If your practice routine requires you to carry your training setup outside onto a patio, into a backyard, or directly to a real-world driving range, relying on a bulky gaming PC becomes highly impractical. For mobile, outdoor-focused players, selecting a launch monitor that natively integrates with iOS devices like an iPad or iPhone is an absolute necessity.
Mobile app configurations process your swing telemetry within a clean, streamlined user interface, providing immediate numerical data readouts and simple, color-coded 2D ball flight lines. This streamlined data flow reduces the processing load on your device’s internal chips, preserving battery life and preventing hardware overheating issues when operating out in the direct summer sun.
5. Outdoor Environmental Challenges: Navigating Solar Light and Thermal Currents
Operating a launch monitor outdoors under direct sunlight introduces an entirely different set of environmental challenges than practicing inside a controlled, indoor commercial bay. Solar rays emit intense levels of invisible electromagnetic and infrared radiation that can heavily disrupt sensitive tracking sensors.
Mitigating Direct Solar Overexposure
Ground photometric systems and overhead camera arrays use high-speed optical lenses that are highly susceptible to solar glare. Direct afternoon sunlight striking a launch monitor’s optical glass face can overexpose the internal camera sensors, completely washing out the high-contrast dimple details on your golf ball cover.
When using a camera-based unit outdoors, you must position the hardware under a dedicated shade canopy, beach umbrella, or covered patio frame. This physical shade creates a controlled environment directly over the hitting zone, allowing the camera’s global electronic shutter to cleanly identify the ball and capture accurate launch frames without light distortion.
Dealing with Wind and Thermal Current Refraction
Radar-based launch monitors are completely immune to camera glare issues, making them highly effective under bright outdoor skies. However, radar waves travel through open air, meaning their tracking signals can be subtly affected by heavy environmental changes.
High-velocity crosswinds, blowing yard debris, or intense thermal air currents rising off hot concrete patio bricks can create micro-distortions in the path of a radar wave. To maintain tour-grade tracking data outdoors with a radar system, ensure the physical path between the radar panel face, the ball position, and the catch net remains completely clear of moving obstacles, stray yard equipment, or blowing low-level foliage.
6. The Premium Upgrade: Optimizing Hitting Mats and Structural Enclosures
When investing in a premium launch monitor to systematically improve your golf swing, pairing your elite electronics with cheap, low-grade training accessories will actively ruin your tracking data and risk permanent damage to your property. Sourcing professional-grade simulator components is the ultimate way to maximize your investment.
Integrating Strike-Forgiving Turf Materials
Ground-based launch monitors and overhead camera arrays watch the exact behavior of your club head as it enters the lower zone of the swing arc. Cheap, standard driving range mats feature rigid nylon fibers glued directly over a thin layer of dense foam padding resting on raw concrete or stone bricks. When a golf club strikes this unyielding surface, the head bounces artificially off the floor.
This harsh bounce skews the club path, dynamic loft, and angle of attack metrics on your launch monitor, outputting highly distorted data that does not match real grass turf compression. You must upgrade your hitting surface to a premium stance mat system featuring an independent, strike-forgiving turf insert. Premium inserts use deep-pile synthetic fibers designed to let the iron head move down and through the ball naturally, ensuring your indoor swing data perfectly mirrors your outdoor on-course metrics while protecting your joints from repetitive impact shock.
Installing Heavy-Duty Projectile Containment Nets
An erratic shank or an off-center toe strike traveling at speeds exceeding 140 miles per hour carries immense kinetic energy. To safely contain these rogue shots in a residential backyard or garage setup, your target net must be woven from high-density, multi-layer polyester or archery-grade nylon fibers designed for heavy impact absorption.
Ensure your net frame utilizes heavy-wall steel piping or commercial-grade aluminum tracking wrapped in high-impact safety foam padding. The netting must feature dedicated side-barrier attachments or “shank nets” that extend outward past your primary hitting line. This structural barrier protects surrounding property, windows, and nearby guests, allowing you to execute full, aggressive driver swings with absolute peace of mind.
7. Custom Tuning Hack: The Precision target Calibration Sequence
To guarantee that your launch monitor reads your horizontal launch directions and push/pull tendencies with absolute accuracy, avoid relying solely on the device’s basic internal auto-alignment features. Implement this physical calibration hack before every practice session to lock down your target zero-line:
- Lay a thin, perfectly straight four-foot aluminum straight-edge ruler flat onto your hitting turf, aligning it precisely with your physical target line pointing toward the center of your net.
- Position your golf ball exactly inside the center channel of the aluminum straight-edge.
- Use a high-contrast white chalk line or string line to extend this target axis all the way to the base of your catch net.
- Open your launch monitor’s advanced utility menu on your mobile app or PC terminal and access the manual alignment camera overlay view.
- Adjust the digital alignment cursor until the software’s centerline sits perfectly parallel to your physical aluminum straight-edge ruler.
- Remove the ruler and strike a series of soft, straight putts along the established line.
Mechanically locking down the physical geometry of your launch monitor before starting your practice sessions completely eliminates internal data drift, ensuring that every push, pull, or dead-straight shot displayed on your screen is a true reflection of your actual golf swing.